Butter Mints

The concept of a butter-mint may sound crazy to some of you… mints made out of butter. Yes, pure butter! There are some recipes that call for a mix of butter & coconut oil or coconut butter… but I prefer the plain old, grass-fed butter variation that lends itself to a very silky, melty texture and pure taste of mint (instead of coconut-mint). But, what the heck are butter mints anyway? Right. Well, they are just little dollops of flavored butter, basically. In this case, flavored with peppermint extract, a bit of raw honey, sea salt, and some raw cacao powder. Very simple. They look like this:

But, why would you just decide to eat some dollops of butter?? Right. So, say you find yourself craving sugar every day. Or say your child is always asking for cookies or sweets - Butter Mints can be a great alternative to these things. It is impossible to eat many at once (I can’t do more than 3) as they are just dollops of healthy fat going in your belly - which fills you up quite fast as the digestion required to break that down takes a longer time than it does for a cracker or sugar cookie. Fat burns longer than sugar - and it also slows down the absorption of sugar so that you enjoy sustained levels of blood sugar instead of spikes. There have now been many studies that show fat doesn’t make you fat… it’s mainly sugar and excessive simple carbohydrates that do that, but beyond the weight issue, healthy fatty acids from grass-fed butter nourish and fuel our brains, establish good hormone health, and increase good cholesterol. I consider butter an essential food group for kids, especially. Read more about just how healthy butter can be here. I keep a jar of these in the freezer for my toddler (and myself too, let’s be honest) and he eats them as “special treats” often - because they are delicious! So, now that you are convinced it’s worth a try, here’s the recipe:

Pure Butter Mints:

  • ½ cup butter (1 stick), organic grass-fed butter is the healthiest! 
  • ¼ tsp. peppermint extract (or more to taste)
  • 2 Tbs. raw honey
  • Small pinch of unrefined sea salt
  • Optional: 1 Tbs. cacao powder for a chocolate version

Bring butter to room temperature, mix all ingredients in a bowl with a spatula until silky smooth and completely mixed. Place butter mixture into a plastic bag or pastry bag and use a pastry tip to squeeze nickel-sized dollops onto a cookie sheet lined with parchment paper (or just cut the corner end off of your plastic bag). Place in refrigerator for at least 2 hours or until set - store in a glass jar in the freezer and eat chilled! 

Summer Corn with Umeboshi

Looking for a new way to jazz up all that corn on the cob your family is eating this summer? We love ours grilled and charred with olive oil and salt, Mexican-style with chili powder, cilantro, and lime, and also this way - with a smear of umeboshi paste and gomasio on top. It’s just as easy as anything to make, and chances are you have NO idea the benefits of eating this intensely pickled, funny sounding Japanese plum - it’s great to have an easy way of incorporating them into such an American staple. 

Food Facts: Umeboshi Plums (or plum paste)

Umeboshi salt plums are extremely sour and salty. They are commonly called “Japanese alka seltzer” because of their common use in treating digestive upset. They are highly alkalizing and can help with indigestion, diarrhea, liver issues, fatigue, the elimination of toxins and even worms! Because of their action on the liver, they have also gotten a popular reputation as a hangover cure. You can buy them whole or commonly as vinegars or pastes. One umeboshi plum a day = the apple of the East! 

Summer corn with Umeboshi

Fresh corn, kept on the cob

2 Tbsp umeboshi paste

1 splash Mirin rice wine

Gomasio (a sesame seed and sea salt mixture) or toasted sesame seeds

Cayenne pepper (optional)

Grill or steam corn to desired doneness. While your corn is cooking, mix umeboshi paste with a splash of mirin and stir/whisk together to thin the paste - you may need a splash of water as well to taste. Umeboshi paste is VERY strong, so thinning it out makes the flavor less punchy and adding the wine will balance a little sweetness into the paste. Spread a thin layer over each cob, top with gomasio sprinkles or sesame seeds and cayenne for kick. 

Breakfast Nut Muffins

I’ve been eating eggs for breakfast for like… ever. Especially while pregnant, I’m always looking for more ways to add protein and healthy fat into my daily meals so I can stay energized while eating for two. It’s easy to get stuck in a rut of having some morning eggs, toast, and fruit in our household. This meal has been ingrained in me since childhood! Not to say there is anything inherently wrong with bread and fruit… but they are not protein-rich and tend to lead to energy crashes if it’s the only thing you eat in the morning. To better balance your hormones and energy - we need protein and healthy fat to start the day. I tried out these nut flour muffins this week and have to say, although they don’t feel like a classic muffin, they are tasty and much healthier for you (gluten free as well!) than toast with jam. Try ‘em out with your eggs and a side of wild boar sausage for a mega-fueled breakfast of champions! 

image

Nut Flour Muffins:

1 ½ cups raw, organic nuts (almonds, walnuts, hazelnuts and/or pecans)

¼ cup maple syrup

3 eggs from pastured chickens

1 teaspoon organic vanilla extract

¼ teaspoon sea salt

Zest of one lemon

Preheat oven to 375 degrees.

In a blender (VitaMix is best), grind nuts until flour-like consistency; use a spatula to scrape sides if it becomes sticky. Add maple syrup, eggs, vanilla and salt and blend together until there is a smooth consistency.

Pour into sprayed or buttered muffin pan. Bake ~12 minutes, until golden brown and your toothpick comes out clean. Slather generously with grass-fed butter and enjoy hot! Makes 6 standard-sized muffins. 

Ridiculously Easy Raw Chocolate Bars

Some of you might think making your own chocolate sounds like a chore, one which you would be more than happy to simply leave to the professionals. I’m here to tell you this: making your own chocolate could not be ANY easier than this recipe I’m about to share. It’s only 3 basic ingredients. No cooking involved. Just mixing & freezing. Making raw chocolate - without cooking or heat involved - is actually wonderfully healthy for you as well. It is completely, 100% guilt-free dessert! I’ve been mixing up some batches lately and here are my favorites picks for superfood-infused raw chocolates that will make your heart sing: 

Homemade Raw Dark Chocolate:

3 Tbsp organic, unrefined coconut oil

3 Tbsp raw cacao powder

1 tsp raw honey (you can adjust more for taste)

Mix coconut oil and cacao powder in a small bowl and set that bowl inside a larger bowl filled somewhat with warm water - leave the cacao mixture here until the coconut oil softens. Mix well. Stir in honey and any other liquid or powder ingredients you might add (see my variations below), pour into a small dish lined with parchment paper. Freeze until solid - just an hour or so. EAT! 

Raw Maca - Goji - Chocolate (pictured above): Mix in 1 tsp maca root powder to cacao mixture and stir. Sprinkle with goji berries before freezing. I call this the Yin/Yang chocolate. Maca root is a yang tonic, goji berry is a yin tonic - so together they build the yin (substance) and yang (function) energies of our body. A great chocolate to activate your kidneys, which help with our most primal functions of reproduction/fertility and stress recovery. 

Raw Orange Peel - Almond Chocolate: Sprinkle orange zest and flaked almond slivers atop raw chocolate mixture before freezing. This one’s not really on the therapeutic side, unless tasting really good is enough therapy in itself?

Raw Ginger - Turmeric Chocolate: Add ¼ tsp ginger powder & ¼ tsp turmeric powder to cacao mixture and stir. Freeze as is, or top with more fresh grated ginger before freezing. Ginger and turmeric are both invigorating, anti-inflammatory herbs that can help with arthritis and bursitis conditions. If you have pain or poor circulation, go ahead and pump up your chocolate with these. 

yum. 

♡Avocado Chocolate Mousse♡

How to indulge in something luxuriously sweet and tasty and remain true to your health? This is the perfect solution – Avocado Chocolate Mousse. It’s easy to whip up for a special occasion dessert, tastes like a dream, and fits my healthy lifestyle like a glove. 

image

I usually use a mashup of Renee Loux’s recipe for this mousse - more or less of her ingredients depending on what I have in the kitchen. It tends to all taste good with the right amount of tweaking at the end, if necessary. I LOVE how she blends sweet, salty, and umami flavors in this dessert, which is different from most avocado based desserts I’ve seen. This is Valentine’s worthy, I promise - so give it a try! 

Avocado Chocolate Mousse:

2 C ripe avocado

½ C grade B maple syrup

2 flat spoonfuls coconut oil

1 tsp balsamic vinegar

1 ½ tsp vanilla extract

½ tsp shoyu or tamari

¾ C plain/pure raw cacao powder (no sugar added; although I have used a mixture of raw cacao and sweetened cocoa powder before when I was running out… and it was great if you have the sweet tooth!)

Mix all ingredients until very well blended, smooth, and creamy in a food processor. Chill for at least one hour in a sealed container before eating. Stores up to 4 days in the fridge. Serve in ramekins with raspberries and mint, as Renee does, or with fresh strawberries, coarse sea salt, and a dash of cayenne pepper like me! 

Gluten Free or Grain Free?

It can be hard to determine the necessity of going gluten-free. The article above, for me, illustrates a big point in the argument of gluten free vs. grain free. For most people who feel they are “gluten sensitive”, but do NOT have celiac disease, I believe they feel better when they not only cut out gluten, but when they make a concerted effort to cut back on eating grains in general - transitioning their habits into eating more vegetables, fruit, and nuts instead of snacking on crackers, bread, chips, or cookies. This introduces more nutrients and less refined carbohydrates in general into the diet, and will benefit mostly anyone who tries it out. Various people use “gluten free” in various ways… some substituting their wheat crackers for rice crackers, their bread for gluten-free bread, and cookies for gluten-free versions 1 for 1… while others use it as a catalyst to eat less grain in general. The latter group is where I notice the most marked improvements in overall health. How do you feel??

Natural & Effective Flu Prevention

It is STILL flu season, what are you doing about it? In my house, we have a box devoted to herbs and supplements to use in acute situations or for prevention. Here is what I recommend for natural flu prevention for your family. Use one or two - but a few of these products in combination give the best results. Happy Healing. 

image

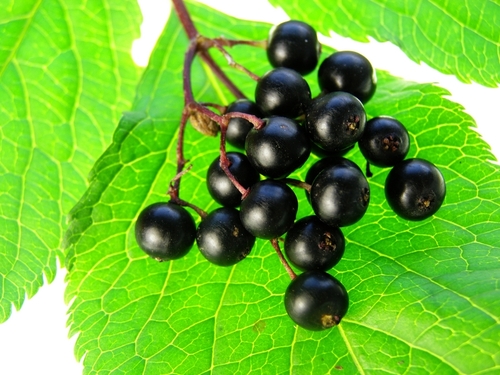
Elderberry and/or Andrographis Extract: These are two great anti-viral herbs that boost your immune health and help fight pathogens. Use these especially if you are teacher, traveler, or health-care practitioner who finds yourself around lots of people this season. Other anti-virals you can buy over the counter are grapefruit seed extract or echinacea angustifolia. Note: Most of these herbs work best when used BEFORE you have full blown symptoms, so taking preventatively is the safest bet. 

image

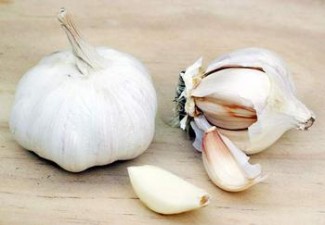
Cayenne capsules or Garlic oil: Cayenne and Garlic are both cooking herbs that have enormous health benefits. Using cayenne pepper as a supplement in capsules can prevent flu, colds, headaches, and arthritis. Making a simple garlic oil is a great use of time. It helps in any case of lung ailment, cough, cold, flu and flu prevention, & infections both bacterial and viral. Note: Make garlic oil by mincing or crushing about 6-8 oz fresh garlic cloves into a mason jar. Add just enough olive oil to cover the garlic and let sit in a warm place with a tight lid on for about 3 days, shaking daily. Strain the mixture and store. You can take 1 tsp of this oil internally up to every hour for colds, flu, fever, and infections. It also makes a great ear-drop oil for ear infections! 

Oscillococcinum Homeopathic Remedy: I think it’s best to take these over the counter vials for prevention, rather than waiting until you have active symptoms. 

Multivitamin: If there is ever a time to take your vitamins - it’s now! Taking a well-rounded whole foods multivitamin is a safe way to ensure you are getting all the nutrients you need and replenishing your daily stores. I like Catalyn from Standard Process or Rainbow Light Organic Multivitamins. 

image

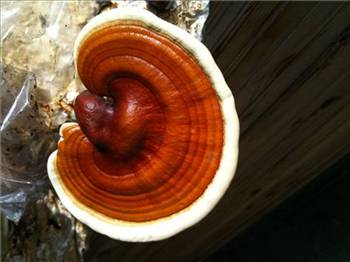
Five Mushroom Formula: Ask your Chinese medicine practitioner about Wu Gu Fang (“5 Mushroom Formula” by Golden Flower). Because it is both tonifying and can kill pathogens, it is safe and effective to take throughout the season as a preventative and can also be used in the initial exposure phase of influenza. It contains 5 species of mushroom that have the power to kill viruses and stimulate your immune system. Good stuff! 

Don’t Eat Sugar or Junk Food: Numerous studies show that eating refined sugar is immediately followed by a decrease in immune function - happening within minutes of consumption. Don’t allow your body to get bogged down by sugar and junk food during this season… it’s not worth it to yourself or your family. Instead, strengthen your defenses with warm meals like hearty soups, cooked veggies and rice, meat broths, and plenty of water or herbal teas. 

*2012 Favorites: Looking Back*

This year is officially over! How are you celebrating? Below are some of my favorite Medicine Kitchen moments from 2012 - my first year writing this little blog and first year of my new home practice. Thanks to all the clients who have made my life thrive and grow this year! 

  • Still love to make variations of these bowls for a healthy dinner or lunch to go. 
  • A good reminder for me to take a breath and recognize the natural beauty around me. 
  • For some reason, I often forget about these amazing nori wrap snacks
  • Love the simplicity of this effective home remedy
  • Still find this inspiring and necessary for all to read. 
  • Kinda craving this noodle dish right now, actually. 
  • Utilizing this healing broth not only for fertility but for chronic illness, gut problems, and weak immunity. 

Things have gotten a little hectic the past couple months, but it is my goal to keep writing and experimenting with what can only be a year full of new learning adventures in our home. Here’s to a great launch of 2013. ♥

Celebrate Health this Thanksgiving

Want to create a vibrant, healthy, gorgeous Thanksgiving meal? There is so much more creativity beyond the turkey and dressing. I love a colorful, visually stimulating plate and that’s one of the reasons why I LOVE Thanksgiving so much – there is such beauty in the food you are about to eat. My mom and I are especially motivated to create the perfect plate on Thanksgiving day. When a better time to celebrate food, wholeness, and the abundance of nature’s gifts to us all? Inspire this love of colorful, vibrant, nutrient-rich food in your family this year by cooking some bold, healthy side dishes to accompany your bird. Click on the images below for recipes. ♥

Sweet Potato and Cauliflower Gratin with Sage:

Thanksgiving side dishes

Raw Kale Salad with Lemon (gotta have your greens):

Raw Cranberry-Orange-Ginger Relish (a personal MUST!):

Healthy thanksgiving sides

Roasted Carrots with Cumin:

Healthy thanksgiving sides

Golden Crusted Brussels Sprouts (my husband’s fave):

healthy thanksgiving sides

Roasted Acorn Squash with Chili-Lime Vinaigrette (it’s DELISH):

healthy thanksgiving sides

Happy Cooking and Happy Eating! xo

Gluten-Free (Flourless) Pancakes

My sister emailed me a recipe for gluten-free pancakes a few weeks ago and claimed they were the B.E.S.T. After my mom made them, and my DAD claimed the same thing, I decided I had to try them, at least once. See, I’m no big pancake eater or maker, for that matter. But I was drawn to the idea of a gluten-free, no refined flour, low sugar, higher protein, and still tastes great and looks great pancake. My first batch wasn’t all that. But after tweaking the recipe to my liking, I found these to truly be pancakes worth sharing. When you are in the mood for that little indulgence and don’t want to feel guilty or gross afterwards - here’s what you do:

Gluten-Free Pancakes

½ C gluten-free whole oats*

½ C whole milk cottage cheese

1 whole egg + 2 egg whites

¼ tsp each cinnamon, nutmeg, ginger 

small pinch sea salt

½ tsp natural vanilla extract, optional

Makes about 4 medium sized cakes. 

That’s it. It’s super easy. Blend all these ingredients in a blender until batter is smooth. Use some coconut oil to grease your pan and start flipping away! These cook rather quickly; once you flip them once to the second side, you will the see the pancake rise in the center and inflate a bit. Once it stops rising, it’s done. Add some fresh fall fruit or pumpkin puree on top and enjoy (with only a slight drizzle of maple syrup and butter if desired). That’s all they need! A true treat. These also don’t taste an inch like cottage cheese, if you are not a fan. Tested on a husband who avoids it like the plague. :)

You can also double this recipe and make for the whole family, or save some batter for yourself in the fridge to use throughout the week for a fast and delicious breakfast. 

*Oats are naturally gluten-free, but most companies package them in facilities where contamination from other gluten sources is inevitable - so certainly for a serious allergy, look for a brand that states gluten-free on the label.